Easily test Chocolatey package development with Boxstarter 2.2 Hyper-V integration by Matt Wrock

Hyper-VA couple weeks ago I released Boxstarter v2.2. The primary feature added is the ability to target Hyper-V VMs. Boxstarter can automatically configure them without any manual setup and can both save and restore checkpoints. You can learn about the details here. I’d like to give a big thanks to Gary Park (@gep13) for providing early feedback and helping me catch some holes I needed to fill in to make this release a better user experience. I’m sure I have not identified the last of them so please, create an issue or discussion on the Codeplex site if you run into issues.

This post will discuss how you can use this new feature to greatly reduce the friction involved in Chocolatey package development or in the creation of Boxstarter-style chocolatey packages to develop Windows environments leveraging Hyper-V VMs. No additional Windows licenses will be required. More on that later.

NOTE: Both the Boxstarter.HyperV PowerShell module and Microsoft’s Hyper-V module require PowerShell version 3 or higher on the VM host. This is automatically available on Windows 8 and server 2012. On Windows 2008 R2, it can be installed via the Windows Management Framework.

Integration testing for Chocolatey packages

When you are authoring a Chocolatey package, you are likely creating something that changes the state of the machine upon which the package is installed. It may simply install a single piece of software or it may install several pieces of software along with various dependencies and possibly configure services, firewall port rules, IIS sites, databases, etc. As the package author you want to make sure that the package can run and perform the installation reliably and repeatably and perhaps on a variety of OS versions. This is almost impossible to test directly on your dev environment.

You want one or more virtual environments that can be started in a clean state that mimics what you imagine most others will have when they download and install your package. Furthermore, as you work out the kinks of your package, you want to be able to start over again and again and again. Virtual machines make this workflow possible.

Hyper-V VM technology, there is a good chance you already have it

There are lots of great VM solutions out there. Besides the cloud solutions provided by Amazon, Microsoft Azure, Rackspace and others, VMWare, Hyper-V and Virtual Box are some very popular non cloud options. Hyper-V is Microsoft’s solution. If you have Windows 8 Pro or greater or Windows 2012 or 2008 R2, this technology is available to you for free. I run Windows 8.1 Pro on a Lenovo X1 laptop with 8GB and can usually have 3 VMs running simultaneously. It works very well.

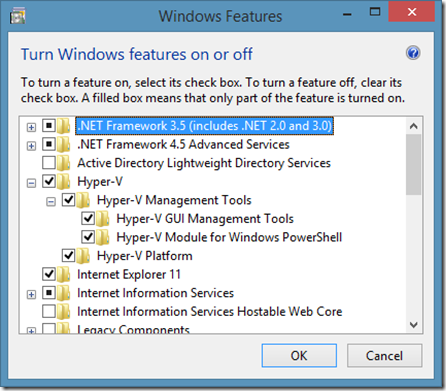
Simply enable the Hyper-V features on your machine either using the “Turn Windows features on or off” GUI

image

or from a command line running:

dism.exe /Online /Enable-Feature:Microsoft-Hyper-V /All
dism.exe /Online /Enable-Feature:Microsoft-Hyper-V-Management-PowerShell

Creating the VM

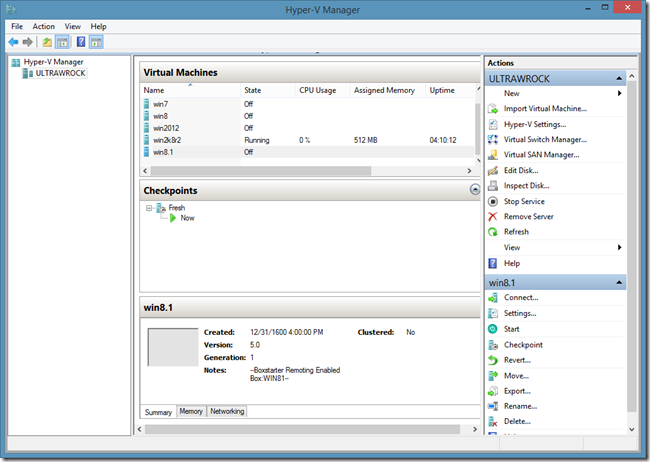
The first thing you need to do is create one or more VMs to reproduce the environment you are targeting. Developing Boxstarter, I have 5 VMs:

image

I have one for every Windows version I care to test on. I save the VM with a base os install with no configuration tweaks other than maybe changing the computer name and adding a admin user. I want to have Windows with the default settings. The first thing you need to get started creating a VM, is a VHD. That is the file type that Hyper-V uses to store the machine. That’s really all a VM is. It’s a file. It can get much more complicated with different VHD formats, differencing disks, Fixed disks, Dynamically growing disks, etc. I’m not going to get into that here and it is not necessary to understand for what I’m going to show you. However if you find yourself working with VMs a lot and want to learn how to maintain them efficiently, you will want to look into those details.

There are two main ways that I typically create a clean Windows VHD:

Create a new VHD and mount a Windows Install ISO as a DVD drive

If you have a Windows installation ISO file, you can mount this to the VM as a virtual DVD drive. Remember those? You need to create an empty VHD file which represents a system with no OS installed. The VM will boot from the virtual DVD and walk you through the Windows Install wizard. This can all be done through the Hyper-V GUI or from PowerShell:

New-VM -Name "myVM" -MemoryStartupBytes 1GB -NewVHDPath "D:\VHDs\w81.vhdx" -NewVHDSizeBytes 60GB
Set-VMDvdDrive -VMName myVM -Path "C:\ISOs\EVAL_EN-US-IRM_CENA_X64FREE_EN-US_DV5.iso"
Start-VM "myVM"

Once I complete the Windows installation and rename the computer, I create a checkpoint so that I can always snap to the point in time when windows had absolutely no additional configuration beyond installation and computer rename.

Checkpoint-VM -Name "myVM" -SnapshotName "BareOS"

Create a new VM from an existing base OS VHD

After performing the above procedure from an ISO, I like to “freeze” the VHD of the newly installed OS. To do this, I create a differencing disk of that VHD and mark the original VHD as read only. Now I can create new VMs based on the differencing disk that contains only the difference of the fresh install and all subsequent work. Here, I’ll create a differencing VHD based on the VHD we created for our new VM above and then we will attach it to the new VM:

Stop-VM myVM
New-VHD -Path "D:\VHDs\w81diff.vhdx" -ParentPath "D:\VHDs\w81.vhdx" -Differencing
Set-VMHardDiskDrive -VMName myvm -Path "D:\VHDs\w81diff.vhdx"
Start-VM myVM


Downloading evaluation versions of Windows installers

You don't need a purchased copy of Windows or a fancy shmancy MSDN subscription to get a Windows OS for testing purposes. As of this posting, anyone can download evaluation copies of Windows 8.1, Server 2008 R2 and 2012 R2. The evaluation period is between 90 and 180 days depending on the version you download. In addition to the ISO, the server OS versions also provide an option to download VHD’s. These allow you to skip the OS installer. They come with a builtin Administrator account with a password set to Pass@word1. Convenient since that is the same password I use for all of my personal online accounts. When the evaluation expires, it is perfectly legal to simply start over from the original installer or VHD. Here are the current URLs you can use to download these evaluations:

Connecting the VM to the internet

While it is certainly possible and sometimes desirable to write Chocolatey packages that work fine offline, chances are that you want your VM to be able to access the world wide web. There are several ways to do this. For most “normal” dev environments, the following approach should work.

Get a listing of your Network Adapters:

C:\> Get-NetAdapter

Name                      InterfaceDescrip                        ifIndex Status                                                                          s
----                      --------------------                    ------- -----
Bluetooth Network Conn... Bluetooth Device (Personal Area Netw...       5 Di...
Wi-Fi                     Intel(R) Centrino(R) Advanced-N 6205          3 Up


Next add a “Virtual Switch” that binds to your actual network adapter. This only has to be done once on the VM host. The switch can be reused on all guests created on the host. After adding the switch, it can be applied to the VM:

New-VMSwitch -NetAdapterInterfaceName "Wi-Fi" -Name MySwitch
Set-VMSwitch -Name "myVM" -VMSwitch "MySwitch"

In my case, since I am using a wireless adapter, Hyper-V creates a network bridge and a new Hyper-V adapter that binds to the bridge and that any VM using this switch will use.

Getting Boxstarter

There are lots of ways to get the Boxstarter modules installed. If you have Chocolatey, just CINST Boxstarter. Otherwise, you can download the installer from either the codeplex site or Boxstarter.org and run the setup.bat in the zip file and then open a new PowerShell window. Since the Boxstarter.HyperV module requires at least PowerShell 3 which can auto load all modules in your PSModulePath and the Boxstarter installer adds the Boxstarter modules to that path, all Boxstarter commands should be available without needing to import any modules explicitly.

Tell Boxstarter where your packages are and build them

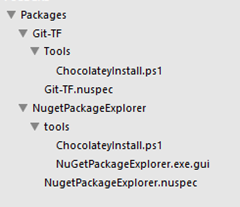
Perhaps the packages you want to test have not yet been pushed to a nuget feed and you want to test the local development version. Boxstarter provides several commands to make creating packages simple. See the boxstarter docs for details. We’ll assume that we have pulled our package repository from source control to a local Packages directory. It has two packages:

image

Now we will tell Boxstarter where our local packages are stored by changing Boxstarter’s localRepo setting from the default BuildPackages folder in Boxstarter’s module directory to our package directory.

C:\dev\Packages> Set-BoxstarterConfig –LocalRepo .
C:\dev\Packages> $Boxstarter

Name                           Value
----                           -----
IsRebooting                    False
NugetSources                   http://chocolatey.org/api/v2;http://www.myget...
BaseDir                        C:\Users\Matt\AppData\Roaming\Boxstarter
LocalRepo                      C:\dev\packages
RebootOk                       True
Log                            C:\Users\Matt\AppData\Local\Boxstarter\boxsta...
SuppressLogging                False


Checking the $Boxstarter variable that holds our boxstarter settings confirms that Boxstarter is tracking our local repository where we are currently working.

Now Boxstarter can build our packages by using the Invoke-BoxstarterBuild command:

C:\dev\Packages> Invoke-BoxStarterBuild -all
Boxstarter: Scanning C:\dev\packages for package folders
Boxstarter: Found directory Git-TF. Looking for Git-TF.nuspec
Calling 'C:\Chocolatey\chocolateyinstall\nuget.exe pack .\Git-TF\Git-TF.nuspec -NoPackageAnalysis'.
Attempting to build package from 'Git-TF.nuspec'.
Successfully created package 'C:\dev\packages\Git-TF.2.0.2.20130214.nupkg'.

Your package has been built. Using Boxstarter.bat Git-TF or Install-BoxstarterPackage Git-TF will run this package.
Boxstarter: Found directory NugetPackageExplorer. Looking for NugetPackageExplorer.nuspec
Calling 'C:\Chocolatey\chocolateyinstall\nuget.exe pack .\NugetPackageExplorer\NugetPackageExplorer.nuspec -NoPackageAnalysis'.
Attempting to build package from 'NugetPackageExplorer.nuspec'.
Successfully created package 'C:\dev\packages\NugetPackageExplorer.3.7.0.20131203.nupkg'.

Your package has been built. Using Boxstarter.bat NugetPackageExplorer or Install-BoxstarterPackage NugetPackageExplorer will run this package.

This iterates all folders in our local repo and creates the .nupkg files for all our package nuspec files. Note that if we do not want to build every package we could specify a single package to build:

C:\dev\Packages> Invoke-BoxStarterBuild -Name Git-TF

Testing the packages in your VMs

Now we are ready to test our packages. Unless the package is incredibly trivial, I like to test on at least a PowerShell 2 and a Powershell 3 (or 4) environment since there are some unobvious incompatibilities between v2 and post v2 versions. We will test against Server 2012 and Server 2008 R2. We can pipe our VM names to Boxstarter’s Enable-BoxstarterVM command which will inspect the VM and ensure that Boxstarter can connect to the VM using PowerShell remoting. If it can not, Boxstarter will manipulate the VM machine’s registry settings in its VHD to enable WMI Firewall rules which will allow Boxstarter to connect and enable PowerShell remoting. We will also ask Boxstarter to restore a checkpoint (named “fresh”) that we previously set which brings the VM to a clean state.

After ensuring that it can establish connections to the VMs, Boxstarter copies the Boxstarter modules and the local repository nupkg files to the VM. Then Boxstarter initiates the installation of the package on the VM.

So lets have Boxstarter test a package out on our VMs and analyze the console output.

C:\dev\Packages> "win2012","win2k8r2" | Enable-BoxstarterVM
-Credential $c -CheckpointName fresh | Install-BoxstarterPackage -PackageName NugetPackageExplorer -Force
Boxstarter: fresh restored on win2012 waiting to complete...
Boxstarter: Configuring local Powershell Remoting settings...
Boxstarter: Testing remoting access on win2012...
Boxstarter: Testing WSMAN...
Boxstarter: fresh restored on win2k8r2 waiting to complete...
Boxstarter: Configuring local Powershell Remoting settings...
Boxstarter: Testing remoting access on WIN-HNB91NNAB2G...
Boxstarter: Testing WSMAN...
Boxstarter: Testing WMI...

Here I pipe the names of my VMs to Boxstarter’s Enable-BoxstarterVM command. I have a checkpoint named “fresh” which is my “clean” state so Boxstarter will restore that checkpoint before proceeding. The result of Enable-BoxstarterVM, which is the computer name and credentials of my VMs, is piped to Install-BoxstarterPackage which will perform the package installation.

We can see that Boxstarter checks WSMan, the protocol used by PowerShell remoting, and if that is not enabled it also checks WMI. Windows 2012 has PowerShell remoting enabled by default so there is no need to check WMI, but Server 2008 R2, does not have PowerShell remoting enabled and thus checks for WMI. I am using the built-in administrator account and WMI is accessible. Therefore Boxstarter does not need to make any adjustments to the VM’s registry. If WMI was not accesible or if I was using a local user, Boxstarter would need to edit the registry and enable the WMI ports and also enable LocalAccountTokenFilterPolicy for the local user.

Also note that the 2008 R2 VM has a different computer name than the VM Name, WIN-HNB91NNAB2G. Boxstarter will find the DNS name of the VM and pass that on to the Install-BoxstarterPackage command which needs that to establish the remote connection.

Boxstarter Version 2.2.56
(c) 2013 Matt Wrock. http://boxstarter.org

Boxstarter: Configuring local Powershell Remoting settings...
Boxstarter: Configuring CredSSP settings...
Boxstarter: Testing remoting access on win2012...
Boxstarter: Remoting is accesible on win2012
Boxstarter: Copying Boxstarter Modules and local repo packages at C:\dev\Packages to C:\Users\Matt\AppData\Local\Temp on win2012...
Boxstarter: Creating a scheduled task to enable CredSSP Authentication on win2012...

Here Boxstarter begins the install on win2012. It determines that remoting to the VM is accessible, copies the Boxstarter modules and the local packages and enables CredSSP (using CredSSP allows Boxstarter packages to access other remote resources that may need the user’s credentials like network shares).

[WIN2012]Boxstarter: Installing package 'NugetPackageExplorer'
[WIN2012]Boxstarter: Disabling Automatic Updates from Windows Update
[WIN2012]Boxstarter: Chocolatey not instaled. Downloading and installing...
[WIN2012]+ Boxstarter starting Calling Chocolatey to install NugetPackageExplorer. This may take several minutes to complete...
Chocolatey (v0.9.8.23) is installing 'NugetPackageExplorer' and dependencies. By installing you accept the license for 'NugetPackageExplorer' and each dependency you are installing.
______ DotNet4.5 v4.5.20120822 ______
Microsoft .Net 4.5 Framework is already installed on your machine.
______ NugetPackageExplorer v3.7.0.20131203 ______
Downloading NugetPackageExplorer 64 bit (https://github.com/mwrock/Chocolatey-Packages/raw/master/NugetPackageExplorer/NpeLocalExecutable.zip) to C:\Users\ADMINI~1\AppData\Local\Temp\chocolatey\NugetPackageExplorer\NugetPackageExplorerInstall.zip
Extracting C:\Users\ADMINI~1\AppData\Local\Temp\chocolatey\NugetPackageExplorer\NugetPackageExplorerInstall.zip to C:\Chocolatey\lib\NugetPackageExplorer.3.7.0.20131203...
NugetPackageExplorer has finished successfully! The chocolatey gods have answered your request!
'C:\Chocolatey\lib\NugetPackageExplorer.3.7.0.20131203\NugetPackageExplorer.exe' has been linked as a shortcut on your desktop
File association not found for extension .nupkg
    + CategoryInfo          : NotSpecified: (File associatio...xtension .nupkg
   :String) [], RemoteException
    + FullyQualifiedErrorId : NativeCommandError
    + PSComputerName        : win2012

Elevating Permissions and running C:\Windows\System32\WindowsPowerShell\v1.0\powershell.exe -NoProfile -ExecutionPolicy unrestricted -Command "& import-module -name  'C:\Chocolatey\chocolateyinstall\helpers\chocolateyInstaller.psm1'; try{cmd /c assoc .nupkg=Nuget.Package; start-sleep 6;}catch{write-error 'That was not
sucessful';start-sleep 8;throw;}". This may take awhile, depending on the statements.
Elevating Permissions and running C:\Windows\System32\WindowsPowerShell\v1.0\powershell.exe -NoProfile -ExecutionPolicy unrestricted -Command "& import-module -name  'C:\Chocolatey\chocolateyinstall\helpers\chocolateyInstaller.psm1'; try{cmd /c ftype Nuget.Package="C:\Chocolatey\lib\NugetPackageExplorer.3.7.0.20131203\NugetPackageExplorer.exe" %1; start-sleep 6;}catch{write-error 'That was not sucessful';start-sleep 8;throw;}". This may take awhile, depending on the statements.
NuGet Package Explorer has finished successfully! The chocolatey gods have answered your request!
Adding C:\Chocolatey\bin\NuGetPackageExplorer.bat and pointing to '%DIR%..\lib\nugetpackageexplorer.3.7.0.20131203\nugetpackageexplorer.exe'.
Adding C:\Chocolatey\bin\NuGetPackageExplorer and pointing to '%DIR%..\lib\nugetpackageexplorer.3.7.0.20131203\nugetpackageexplorer.exe'.
Setting up NuGetPackageExplorer as a non-command line application.
Finished installing 'NugetPackageExplorer' and dependencies - if errors not shown in console, none detected. Check log for errors if unsure.
[WIN2012]+ Boxstarter finished Calling Chocolatey to install NugetPackageExplorer. This may take several minutes to complete... 00:00:31.8857706
[WIN2012]Boxstarter: Enabling Automatic Updates from Windows Update

Errors       : {File association not found for extension .nupkg}
ComputerName : win2012
Completed    : True
FinishTime   : 12/28/2013 1:05:13 AM
StartTime    : 12/28/2013 1:04:00 AM

Now we see mostly what we would expect to see if we were doing a vanilla CINST via Chocolatey. What is noteworthy here is that Boxstarter outputs an object to the pipeline for each VM. This object holds basic metadata regarding the installation including any errors encountered. In our case, the installation did produce one non-terminating error. Overall the install is successful.

Now Boxstarter moves on to the Server 2008 R2 VM.

Boxstarter: Testing remoting access on WIN-HNB91NNAB2G...
Boxstarter: Enabling Powershell Remoting on WIN-HNB91NNAB2G
Boxstarter: PowerShell Remoting enabled successfully
Boxstarter: Copying Boxstarter Modules and local repo packages at C:\dev\Packages to C:\Users\Matt\AppData\Local\Temp on WIN-HNB91NNAB2G...
Boxstarter: Creating a scheduled task to enable CredSSP Authentication on WIN-HNB91NNAB2G...

This is slightly different from the Server 2012 install. PowerShell remoting was not initially enabled on Windows 2008 R2; so Boxstarter needed to enable it before it could copy over the Boxstarter modules and local packages.

[WIN-HNB91NNAB2G]Boxstarter: Installing package 'NugetPackageExplorer'
[WIN-HNB91NNAB2G]Boxstarter: Disabling Automatic Updates from Windows Update
[WIN-HNB91NNAB2G]Boxstarter: Downloading .net 4.5...
[WIN-HNB91NNAB2G]Boxstarter: Installing .net 4.5...
[WIN-HNB91NNAB2G]Boxstarter: Chocolatey not instaled. Downloading and installing...

[WIN-HNB91NNAB2G]Boxstarter: Enabling Automatic Updates from Windows Update
[WIN-HNB91NNAB2G]Boxstarter: Restart Required. Restarting now...
Boxstarter: Waiting for WIN-HNB91NNAB2G to sever remote session...
Boxstarter: Waiting for WIN-HNB91NNAB2G to respond to remoting...

Next is more activity that we did not see on Server 2012. Server 2008 R2 comes with .Net 2.0 installed. Chocolatey needs at least 4.0 and Boxstarter will install v4.5 if v4.0 is not installed since v4.5 is an “in place upgrade” from 4.0 and thus includes 4.0. After installing .Net4.5 and Chocolatey, there is a pending reboot. Boxstarter needs to reboot the VM before proceeding with the install in order to reduce the risk of a failed install.

The remainder of the Server 2008 R2 install is identical to the Server 2012 install and so we will not examine the rest of the output.

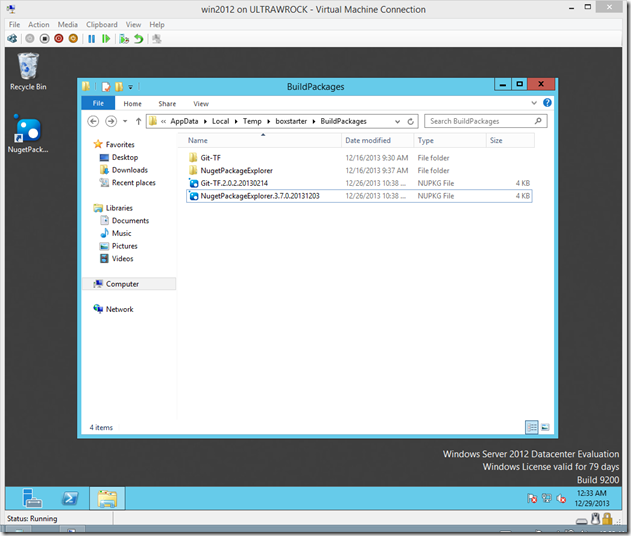
Now your VMs should have the NugetPacketExplorer installed and all *.Nupkg files should be associated with that application.

image


Creating Checkpoints

In the Enable-BoxstarterVM call we saw above, we restored to a known clean state that we had previously saved. However, we can also have Boxstarter create the clean state. In the example we used above, we hade a checkpoint named “fresh” that Boxstarter restored. If that checkpoint did not exist, Boxstarter would have created one just after exiting Enable-BoxstarterVM.

Rolling package testing into Continuous Integration

This post shows you how you can use Boxstarter and Hyper-V to create an environment where you can easily test package development. However, wouldn’t it be great to take this to the next level and have your package checkins automatically kickoff a package install on a Azure or AWS VM? My next post will explore just that which will be possible when I release the Windows Azure integration.
Released Boxstarter 2.1: Install multiple Windows environments in one command and better pipeline output by Matt Wrock

multiboxToday I released Boxstarter v2.1.0 which includes support for piping multiple machines to the Install-BoxstarterPackage command and much improved options for receiving output on both the standard output pipeline as well as the host console. This release also adds a few bug fixes and some “Fit and Finish” details for remote installs.

These features were originally intended for v2.0, but the core 2.0 remoting integration proved to be much more involved than anticipated and stood well on their own. So in the interest of getting that release out the door sooner, I held off on these rather minor additions. I think this release does provide a better experience but it is the final prerequisite for the VM integration release coming next.

Multiple Machine Installs

While this is possible in v2.0 by simply looping over a list of computer names, connection URIs or PowerShell sessions, the first class support for installing packages on multiple machines does provide some improved efficiencies and an easier way of processing the results. Boxstarter can configure the local Windows PowerShell remoting settings for all machines at once instead of setting and rolling back on each machine.

The ComputerName, ConnectionURI and Session parameters of Install-BoxstarterPackage can now be passed in an array and can also be passed in the pipeline input.

$cred=Get-Credential=MyTargetMachine\myusername
Get-WebServerNames | 
  Install-BoxstarterPackage -PackagNamee WebPackage -Credential $cred –Force


Assuming Get-WebServerNames returns an array of server names, the above command will install the WebPackage package on each. Boxstarter will ensure that all of those servers are in the local machine’s list of trusted hosts and ensures that credentials can be delegated to them as well before establishing the remote session.

Receive installation results as separate objects on the pipeline

For each machine that Boxstarter runs the package, a PSObject is returned with metadata related to the results of the install.

result2

The properties included in the PSObject are:

  • ComputerName: The name of the computer where the package was installed
  • StartTime: The time that the installation began
  • FinishTime: The time that Boxstarter finished the installation
  • Completed: True or False indicating if Boxstarter was able to complete the installation without a terminating exception interrupting the install. Even if this value is True, it does not mean that all components installed in the package succeeded. Boxstarter will not terminate an installation if individual Chocolatey packages fail. Use the Errors property to discover errors that were raised throughout the installation.
  • Errors: An array of all errors encountered during the duration of the installation.

There are probably other properties that will be added to this object in future releases. Maybe a list of all chocolatey packages successfully installed.

Adjusting host output verbosity

A lot of the output that Boxstarter would previously output to the console is now sent to the verbose stream. In other words, by default, Boxstarter tries to limit output to things that are either of immediate interest or indicate that something that might take a while is taking place. Everything else is still available, but requires the use of the –Verbose parameter to be output to the console. However, all verbose content is always written to the Boxstarter.log file in case you want to refer to this information later.

If you would like to silence everything except the standard output stream (all verbose and write-host output), you can set $Boxstarter.SuppressLogging to $True.

> $Boxstarter.SuppressLogging=$True
> "win7","win2012" | Install-BoxstarterPackage -PackageName test-package -Credential $cred -Force

Errors       : {}
ComputerName : win7
Completed    : True
FinishTime   : 11/30/2013 9:41:58 PM
StartTime    : 11/30/2013 9:41:54 PM

Errors       : {}
ComputerName : win2012
Completed    : True
FinishTime   : 11/30/2013 9:42:11 PM
StartTime    : 11/30/2013 9:41:58 PM

Other fixes and improvements

In addition to these features added, there are a few additional items worthy of notice:

  • Don't touch UAC or AutoLogon registry keys on remote installs.
  • Improve Remote Reboot detection and suppressing reapeted connection creations while remote machine is installing windows updates.
  • Fix overriding organization update servers with the public Windows Update server.
  • Fix remoting configuration when client has assigned Trusted Hosts to a global wildcard.
  • Improve reliability of .net 4.5 installation as Chocolatey prerequisite particularly when running on a newly installed OS.

Up Next: Boxstarter Virtualization Module

Other than possible bug fix releases, I don’t plan on any releases between now and the first version of a new Boxstarter PowerShell module that focuses on VM provisioning. This module should provide support for Hyper-V, AWS, and Azure VMs. Given a VM name, Boxstarter will enable PowerShell remoting on the VM with no user intervention. It will eliminate the need to check and manually configure remoting on target machines. It will return a ConnectionURI that Install-BoxstarterPackage can use to install packages. At least for Hyper-V, this will include the ability to reset the VM to a specified checkpoint as well.

So stay tuned…

Released Boxstarter 2.0: Remote Windows Environment Installs, Packageless Scripts and a New Documentation Web Site! by Matt Wrock

amazon

A couple weeks ago, I released Boxstarter 2.0 with lots of new features, a couple of which I think are especially cool. Now that the documentation and new web site at Boxstarter.org are complete, I think a proper blog post is in order.

While I did bump the major version, this release is compatible with any 1.x.x Boxstarter script. The version number increase is intended to emphasize some significant features introduced in this release.

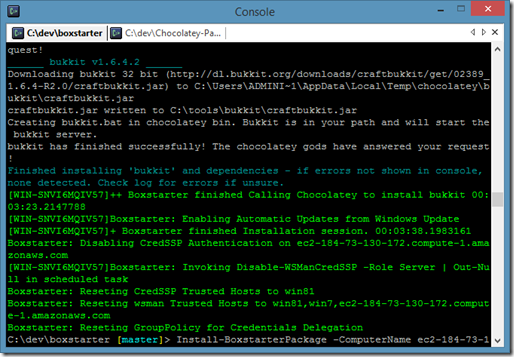
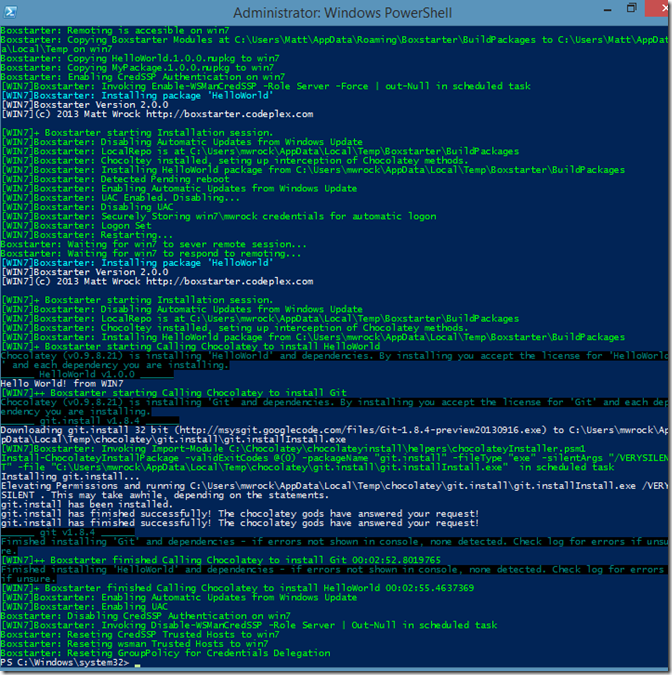
Above is a screenshot of installing a Minecraft server onto an AWS Machine on my local laptop powershell console.

Remote Installations

Perhaps the most significant feature introduced in this release is remote installations - the ability to point Boxstarter to any remote machine and supply a package that can be installed on that machine from the user’s local command line. This could be your other laptop or a Hyper-V, Azure or AWS VM.

This does require powershell remoting to be enabled on the remote machine. That’s uper simple to do. Just run this command as administrator on the remote machine.

Enable-PSRemoting –Force

You only have to do this once. However, if WMI ports are open on that machine, Boxstarter can enable remoting remotely. Remoting on the local machine where Boxstarter runs is completely configured, if necessary, by Boxstarter. You can install Boxstarter Packages (which are Chocolatey packages really) on any remote machine that meets Boxstarter’s prerequisites (at least Powershell 2 on Windows 7/2008R2 or higher) just like you would locally with this command:

$cred=Get-Credential=MyTargetMachine\myusername
Install-BoxstarterPackage -ComputerName MyTargetMachine -PackageName MyPackage -Credential $cred

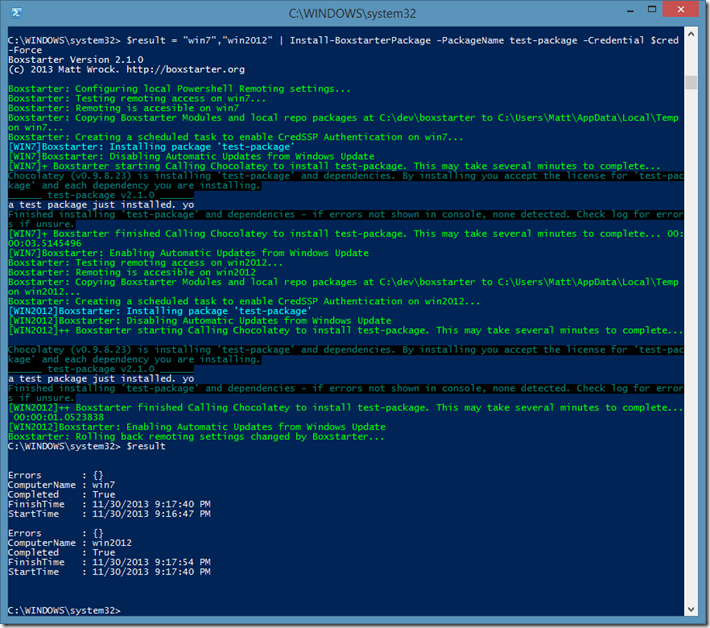
Here is a screenshot of a remote install to a Windows 7 VM: result

Laying the groundwork for VM provisioning

Back in September I began work to automate VM provisioning using Boxstarter. This really ended up being more about learning than simply building features. Long story short: I ended up figuring out exactly how to do this but in the process realized it would be best to “decouple” the remote installation from the VM mechanics. So expect the VM stuff fairly soon where you may see a command like this:

Get-BoxstarterVM -VMName MyVM -SnapShotName myCheckpoint | `
Install-BoxstarterPackage -PackageName MyPackage -Credential $creds

Get-BoxstarterVM will enable remoting, restore the optional chekpoint and return a ConnectionURI to be piped to Install-BoxstarterPackage. There will be a different flavor for Hyper-V, Azure and AWS.

No Package needed, Install environments with a Gist!

Now you can use a text file or any URL that contains raw text (like a gist) in lieu of a Package name. If Boxstarter detects that a package name is resolvable to a local file or it begins with http(s)://, Boxstarter will auto generate a temporary package injecting this text as the ChocolateyInstall.ps1. For example:

gist3

Install-BoxstarterPackage -PackageName `
https://gist.github.com/mwrock/7382880/raw/f6525387b4b524b8eccef6ed4d5ec219c82c0ac7/gistfile1.txt

I’d like to credit and thank Eric Williams (@MotoWilliams) for coming up with this great idea. In many cases particularly with a Boxstarter install, there may not be a need to have a Nuget package published on a feed. It might be a one-off install or something intended for just yourself and maybe a few others. So having to pack and push a Chocolatey package is likely overkill.

This also works with the Boxstarter Web Launcher URLs.

http://boxstarter.org/package/nr/url?https://gist.github.com/mwrock/7382880/raw/f6525387b4b524b8eccef6ed4d5ec219c82c0ac7/gistfile1.txt

This doesn’t even require Boxstarter or Chocolatey to be installed. Run this from IE and a .net click-once app is downloaded and installed that will bootstrap a Boxstarter install of the gist script.

Other new Features:

  • Reboots now suspend Bitlocker if enabled, preventing the need to enter your bitlocker key before startig windows
  • Its compatible with the newly released Chocolatey version 0.9.8.23
  • If installing on a machine that does not require a password, Boxstarter will no longer prompt for one if you do not provide Credentials to Install-BoxstarterPackage or if you use the –NoPassword parameter of Invoke-ChocolateyBoxstarter or Boxstarter.bat.

Brand new Boxstarter.org with lots of Documentation and “How To”s

I want Boxstarter to be easy to use and help to be discoverable. So I spent my free time over a weekend composing a bunch of help pages capturing all of the key Boxstarter scenarios. This includes instructions for:

  • Installing Boxstarter
  • Creating Packages
  • Publishing Packages
  • Executing packages

I think I covered most of the permutations of these activities clearly. Please let me know if you find anything that is not clear or if there are gaps not covered.

Hope to be getting back to feature work soon and release the new Boxstarter Virtualization module.

Copy Files From Local Computer to an Azure VM by Matt Wrock

vmI’m currently ironing out my strategy of how my Boxstarter Virtualization module will provision VM’s in Azure. I recently started a blog series of how I will provision local Hyper-V VMs here. My strategy for Azure VMs will be similar in that I will do most of the heavy lifting via Powershell remoting and fortunately lighting up a Azure VM with powershell remoting all set to go is a lot simpler that with a normal Hyper-V VM. The trick is getting the initial boxstarter modules copied to the VM. Based on some cursory googling, there are a lot of people trying to copy files to their azure VM and the most common approach is to copy/paste them via remote desktop. That does not work for me. It has to be 100% hands off.

So here is the script to accomplish this:

#Create and mount a new local VHD$volume = new-vhd -Path test.vhd -SizeBytes 50MB | `  Mount-VHD -PassThru | `  Initialize-Disk -PartitionStyle mbr -Confirm:$false -PassThru | `  New-Partition -UseMaximumSize -AssignDriveLetter -MbrType IFS | `  Format-Volume -NewFileSystemLabel "VHD" -Confirm:$false

#Copy my files  Copy-Item C:\dev\boxstarter "$($volume.DriveLetter):\" -RecurseDismount-VHD test.vhd

#upload the Vhd to azureAdd-AzureVhd -Destination http://mystorageacct.blob.core.windows.net/vhdstore/test.vhd `  -LocalFilePath test.vhd

#mount the VHD to my VMGet-AzureVM MyCloudService MyVMName | `  Add-AzureDataDisk -ImportFrom `  -MediaLocation "http://mystorageacct.blob.core.windows.net/vhdstore/test.vhd" `  -DiskLabel "boxstarter" -LUN 0 | `  Update-AzureVM

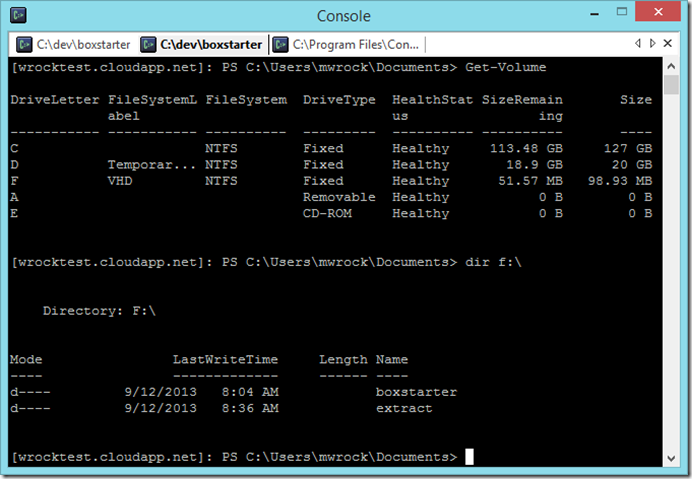
This uses the Powershell v3 Hyper-V module to create the VHD locally. Then it uses the Azure Powershell module (available for download here) to upload that vhd and mount it to my VM.

Here is a screenshot of my remote Powershell session connected to my azure VM.

azurecopy

Maybe there is a better way. I’d love to hear it if you know of one, but this works well without having to expose a public SMB endpoint.

With this in place I can invoke Boxstarter on the VM and initiate a provisioning session that installs and configures all of my things. My virtualization module will allow individuals to provision a VM with a command like this:

New-BoxstarterAzureVM VMName -BoxstarterPackage mypackage `  -InstanceSize "ExtraSmall" -OS "Windows-Server-2012-Datacenter" `  -credential Admin -location  "West US"

Windows VM Provisioning Part 1: Inject a ‘startup on boot ‘ script into a VHD. by Matt Wrock

jokescript

I’m currently in the process of adding a Virtualization module to my Boxstarter project. This post is part of a three part series covering some of the technicalities involved. Although these posts will document how Boxstarter provisions a Windows VM, I think that there will be information covered to accommodate a wide range of scenarios whether you are interested in using Boxstarter or not.

The Boxstarter Scenario

Boxstarter is a set of Powershell modules (or you can simply invoke from a URL) that can deploy a single application or standup a complete environment from a script leveraging Chocolatey and Nuget packaging technologies. Its target scenario is to bring a Windows machine from bare OS to an environment that is fully patched and has everything you need to get stuff done. Yes, there are lots of cool solutions that can do this at enterprise scale but Boxstarter is designed to be light weight and very simple. It can perform this provisioning on a physical machine but what about VMs?

You can of course log on to a VM and use Boxstarter just as you would on any physical machine, but I want to eliminate the need to have to setup network settings and manually RDP or use a Hyper-V console to connect to the VM. Deploying a Boxstarter Install to a VM should be just as simple as any other environment.

How will Boxstarter provision a VM without the need to manually prepare it

Here is the basic flow:

  1. Inject a script into a VHD that will run under the local machine account with administrative privileges on boot. This script will add a firewall rule and edit the Local Account Token Filter Policy.
  2. Use PSEXEC to invoke another script from a user account that will enable powershell Remoting on the VM with credssp authentication so that your credentials in the remote session can be used to access other remote resources from the VM.
  3. Use powershell remoting to Invoke a Boxstarter package from the VM Host but that will run on the VM Guest.
  4. Wrap all of this up into a single, simple command. that can be extended to be VM Vendor agnostic but will work with Hyper-V and Windows Azure VMs out of the box.

Ideally, this could even be leveraged to create a Vagrant Provisioner.

This post will cover the zeroth point above. The use cases of plugging a startup script right into a VHD span well beyond Boxstarter and the means of doing it is not particularly difficult but it did take me a while to figure out how to get it done right to accommodate both simple workstation environments as well as Domain topologies.

Requirements on the Host and Guest

The Goal is that this should work on any “vanilla” bare OS guest install with access to the internet and no “special” networking configuration. No Firewall tweaking, no need to enable powershell remoting on the host or guest and no installation of software on the guest beyond the operating system. That said, the following are required:

  1. The VM guest must be able to access the internet unless your boxstarter package installs everything from a local source.
  2. The Host must be running at least Powershell v.3 and have the Hyper-V module available.
  3. The Guest must be running windows 7, 8, server 2008 R2 or server 2012.
  4. The VHD where the script is injected must contain the system volume of the VM (windows\system32).

The Script Script (the script that installs the script)

The script lives in the Boxstarter.VirtualMachine module and can be called like so:

$vhd=Get-VMHardDiskDrive -VMName "MyVMName"Add-VHDStartupScript $vhd.Path -FilesToCopy "c:\myFiles\file.ps1","..\MyOtherFiles" {    $here = Split-Path -Parent $MyInvocation.MyCommand.Path    . "$here\file.ps1"}
This will take the VHD used by the VM on the host named MyVMName, the file c:\myfiles\file.ps1 as well as all files in ..\MyOtherFiles will be copied to the VHD. Furthermore, the script block above will be stored in a file in the same directory as the copied files. A local Group Policy will be added to the Registry stored in the VHD that will call the above script when the VM next boots. To be clear, the script runs at boot time and not login time so that no separate login is necessary to kick things off. The script will run under the local machine account.

Validate and Mount the VHD

function Add-VHDStartupScript {[CmdletBinding()]param(    [Parameter(Position=0,Mandatory=$true)]    [ValidateScript({Test-Path $_})]    [ValidatePattern("\.(a)?vhd(x)?$")]    [string]$VHDPath,    [Parameter(Position=1,Mandatory=$true)]    [ScriptBlock]$Script,    [Parameter(Position=2,Mandatory=$false)]    [ValidateScript({ $_ | % {Test-Path $_} })]    [string[]]$FilesToCopy = @())if((Get-ItemProperty $VHDPath -Name IsReadOnly).IsReadOnly){    throw New-Object -TypeName InvalidOperationException `      -ArgumentList "The VHD is Read-Only"}    $volume=mount-vhd $VHDPath -Passthru | get-disk | Get-Partition | Get-Volumetry{    Get-PSDrive | Out-Null    $winVolume = $volume | ? {        Test-Path "$($_.DriveLetter):\windows\System32\config"    }    if($winVolume -eq $null){        throw New-Object -TypeName InvalidOperationException `          -ArgumentList "The VHD does not contain system volume"    }
In the beginning of the script we validate the user input and Mount the VHD. Pretty straight forward stuff.

Copy files and create startup script file

$TargetScriptDirectory = "Boxstarter.Startup"mkdir "$($winVolume.DriveLetter):\$targetScriptDirectory" -Force | out-nullNew-Item "$($winVolume.DriveLetter):\$targetScriptDirectory\startup.bat" -Type File `  -Value "@echo off`r`npowershell -ExecutionPolicy Bypass -NoProfile -File `"%~dp0startup.ps1`""`  -force | out-nullNew-Item "$($winVolume.DriveLetter):\$targetScriptDirectory\startup.ps1" -Type File `  -Value $script.ToString() -force | out-nullForEach($file in $FilesToCopy){    Copy-Item $file "$($winVolume.DriveLetter):\$targetScriptDirectory" -Force}

Here we copy the files provided in the FilesToCopy parameter and create a powershell file to hold the script in the script block and a batch file that will invoke the powershell file.

Load the registry hive in the VHD

reg load HKLM\VHDSYS "$($winVolume.DriveLetter):\windows\system32\config\software" | out-null

This takes the file in the VHD that contains HKLM\Software, which is where the computer startup group policies reside and Loads its keys into a new hive referencable from HKLM:\VHDSYS. Now we can query and modify the values in the registry as easily as we can any of our local registry information.

Add the Group Policy

Now that the VHD Registry is loaded, we need to add a Local Group Policy that will invoke our startup.bat file upon boot. This is a bit involved to account for various scenarios such as:

  • What if you already have different startup scripts
  • What if you have already have added a startup script and do not want to add a duplicate
  • What if you have one or more domain group policies

To try and keep things at least somewhat tidy, we will place this logic in a separate function:

function Get-RegFile {    $regFileTemplate = "$($boxstarter.BaseDir)\boxstarter.VirtualMachine\startupScript.reg"    $startupRegFile = "$env:Temp\startupScript.reg"    $policyKey = "HKLM:\VHDSYS\Microsoft\Windows\CurrentVersion\Group Policy"    $scriptNum=0    $localGPONum=0    if(Test-Path "$policyKey\Scripts\Startup\0\0"){        $localGPO = Get-ChildItem "$policyKey\Scripts\Startup" | ? {            (GCI -path $_.PSPath -Name DisplayName).DisplayName -eq "Local Group Policy"        }        if($localGPO -ne $null) {            $localGPONum = $localGPO.PSChildName            $localGPO=$null #free the key for GC so it can be unloaded        }        else{            Shift-OtherGPOs "$policyKey\Scripts\Startup"            Shift-OtherGPOs "$policyKey\State\Machine\Scripts\Startup"        }        if(test-path "$policyKey\Scripts\Startup\$localGPONum"){            $scriptDirs = Get-ChildItem "$policyKey\Scripts\Startup\$localGPONum"            $existingScriptDir = $scriptDirs | ? {                 (Get-ItemProperty -path $_.PSPath -Name Script).Script `                  -like "*\Boxstarter.Startup\startup.bat"            }            if($existingScriptDir -eq $null){                [int]$scriptNum = $scriptDirs[-1].PSChildName                $scriptNum += 1            }            else {                $scriptNum = $existingScriptDir.PSChildName                $existingScriptDir = $null #free the key for GC so it can be unloaded            }        }        $scriptDirs=$null    }    (Get-Content $regFileTemplate) | % {        $_ -Replace "\\0\\0", "\$localGPONum\$scriptNum"    } | Set-Content $startupRegFile -force    return $startupRegFile}

function Shift-OtherGPOs($parentPath){    Get-ChildItem $parentPath | Sort-Object -Descending | % {        [int]$num = $_.PSChildName        $oldName = $_.Name.Replace("HKEY_LOCAL_MACHINE","HKLM:")        [string]$newName = "$($num+1)"        try {Rename-Item -Path $oldName -NewName $newName} catch [System.InvalidCastException] {            #possible powershell bug when renaming reg keys that are numeric            #the key is copied but the old key remains            Remove-Item $oldName -Recurse -force        }    }}
A couple things to note here. The script Group Policies appear to be mirrored at both:
  • HKLM:\VHDSYS\Microsoft\Windows\CurrentVersion\Group Policy\State\Machine\Scripts\Startup
  • HKLM:\VHDSYS\Microsoft\Windows\CurrentVersion\Group Policy\Scripts\Startup
    I honestly do not know why or what the significance is of the different locations. These are just the keys I saw that were affected when I manually played with creating startup scripts inside GPEDIT.MSC.

The Script keys maintain the following subkey structure:

\Scripts\Startup\{policy node}\{script node}

The policy and script nodes are each simple integers starting at 0 and increment for each additional policy scope or script. So a machine with a Local policy containing 1 script and a domain policy containing 2 scripts would look like:

\Scripts\Startup\0\0 – Local policy script

\Scripts\Startup\1\0 – First domain Policy script

\Scripts\Startup\1\1 – Second domain Policy script

From what I could tell in my experimentation, the Local Policy always occupied position 0.

Here are some surprising and unintuitive findings to be aware of:

  • When you are done with the registry you will need to unload it just as we loaded it in order to free up the file. That is not surprising. What is surprising is that if you save any keys to a variable as you are navigating its values, you will need to dereference those variables. It was fun in VB6 and it is still fun today! To add icing to this cake, you also need to do the thing that you should really never do: call GC::Collect() before unloading. Yep, that’s right. Unless of coarse you like Access Exceptions.
  • There seems to be a bug in the powershell registry provider when renaming keys that have a numeric value. Doing so raises a invalid cast exception. It also goes ahead and creates the renamed key but it does not delete the old name. This is why I delete it inside of the catch block.

The call to the above Get-RegFile function and the surrounding import code looks like:

reg load HKLM\VHDSYS "$($winVolume.DriveLetter):\windows\system32\config\software" | out-null$startupRegFile = Get-RegFilereg import $startupRegFile 2>&1 | out-nullRemove-Item $startupRegFile -force
We use the reg command to import the temp file with the altered template and then dispose of the temp file.
 

The registry import template

I found it easiest to create a .reg file containing all of the registry modifications instead of using the powershell registry provider to individually modify the tree. I simply needed to determine the correct policy and script nodes and then inject those into the template. Here is the template:

Windows Registry Editor Version 5.00

[HKEY_LOCAL_MACHINE\VHDSYS\Microsoft\Windows\CurrentVersion\Group Policy\State\Machine\Scripts]

[HKEY_LOCAL_MACHINE\VHDSYS\Microsoft\Windows\CurrentVersion\Group Policy\State\Machine\Scripts\Shutdown]

[HKEY_LOCAL_MACHINE\VHDSYS\Microsoft\Windows\CurrentVersion\Group Policy\State\Machine\Scripts\Startup]

[HKEY_LOCAL_MACHINE\VHDSYS\Microsoft\Windows\CurrentVersion\Group Policy\State\Machine\Scripts\Startup\0]"GPO-ID"="LocalGPO""SOM-ID"="Local""FileSysPath"="%SystemRoot%\\System32\\GroupPolicy\\Machine""DisplayName"="Local Group Policy""GPOName"="Local Group Policy""PSScriptOrder"=dword:00000001

[HKEY_LOCAL_MACHINE\VHDSYS\Microsoft\Windows\CurrentVersion\Group Policy\State\Machine\Scripts\Startup\0\0]"Script"="%SystemDrive%\\Boxstarter.Startup\\startup.bat""Parameters"="""ExecTime"=hex(b):00,00,00,00,00,00,00,00,00,00,00,00,00,00,00,00

[HKEY_LOCAL_MACHINE\VHDSYS\Microsoft\Windows\CurrentVersion\Group Policy\Scripts]

[HKEY_LOCAL_MACHINE\VHDSYS\Microsoft\Windows\CurrentVersion\Group Policy\Scripts\Shutdown]

[HKEY_LOCAL_MACHINE\VHDSYS\Microsoft\Windows\CurrentVersion\Group Policy\Scripts\Startup]

[HKEY_LOCAL_MACHINE\VHDSYS\Microsoft\Windows\CurrentVersion\Group Policy\Scripts\Startup\0]"GPO-ID"="LocalGPO""SOM-ID"="Local""FileSysPath"="%SystemRoot%\\System32\\GroupPolicy\\Machine""DisplayName"="Local Group Policy""GPOName"="Local Group Policy""PSScriptOrder"=dword:00000001

[HKEY_LOCAL_MACHINE\VHDSYS\Microsoft\Windows\CurrentVersion\Group Policy\Scripts\Startup\0\0]"Script"="%SystemDrive%\\Boxstarter.Startup\\startup.bat""Parameters"="""IsPowershell"=dword:00000000"ExecTime"=hex(b):00,00,00,00,00,00,00,00,00,00,00,00,00,00,00,00

Cleaning up

Finally, we unload the registry hive and dismount the VHD:

}finally{    [GC]::Collect()    reg unload HKLM\VHDSYS 2>&1 | out-null    Dismount-VHD $VHDPath}

Again as noted before, we have the unattractive GC Collect. If anyone discovers a way to avoid this please comment but I was not able to find any other way around this. Failing to call Collect results in an Access Exception when unloading the registry. This is only the case if you have used the powershell registry provider to navigate the loaded hive. Also as noted before, if you have referenced any keys in a variable, you must deallocate those variables before the call to GC::Collect().

Reboot a VM attached to the VHD and see the script run

That’s it. Now you can reboot a VM attached to this VHD and its script will execute under the local machine account’s credentials with administrative privileges. Since the VHD format is supported by almost all of the major Virtualization vendors, you should be able to leverage this script on most virtualization platforms.

Next: Enable Powershell Remoting

The next post will explore how to use this script to enable powershell remoting on a VM guest. It is not enough to simply have the script enable remoting since remoting must be enabled by a user account. I’ll show you the approach I found that works to set that up.